⚙️ Configuration Setup
This guide walks you through configuring Passkeyme's Hosted Authentication Pages in the Admin Console. All configuration is done through the web interface - no code changes required.
The "Enable Hosted Authentication" toggle must be enabled for hosted auth pages to work. Without this, authentication requests will be rejected.
1. Enable Hosted Authentication
Before using hosted auth pages, you must enable them in the Passkeyme Admin Console:
- Navigate to Application Settings: Go to Application Edit in your Passkeyme console
- Enable Hosted Authentication: Find the "Enable Hosted Authentication" toggle and turn it ON
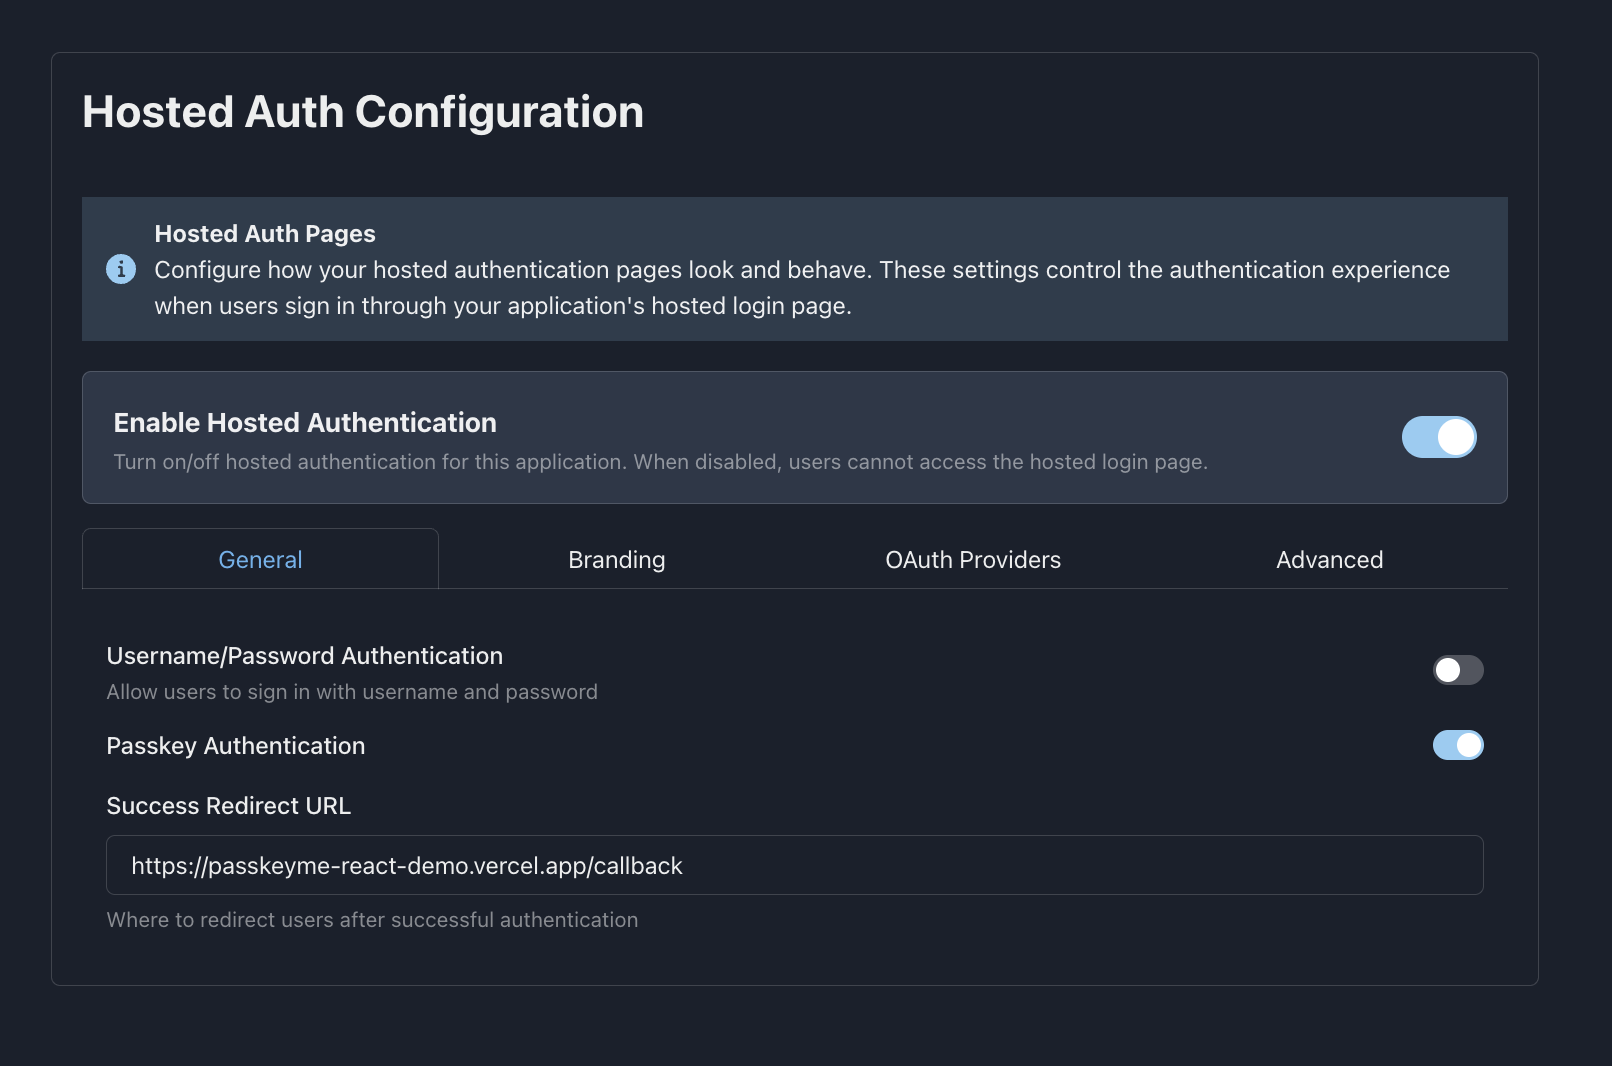
2. General Configuration
Configure the basic authentication settings:
Authentication Methods
- ✅ Username/Password Authentication - Toggle traditional email/password login
- ✅ Passkey Authentication - Toggle WebAuthn/Passkey authentication
- 📝 Callback URL - Set your application's redirect URI after authentication
// Example configuration values
const generalConfig = {
  userPassEnabled: true,    // Username/password authentication
  passkeyEnabled: true,     // Passkey authentication
  callbackUrl: 'https://yourapp.com/auth/callback'
};
- Use HTTPS in production
- Ensure your callback URL can handle the authentication response
- Test with both success and error scenarios
3. Branding Configuration
Customize the hosted pages to match your brand:

Branding Options
- 🏢 Company Name - Display your company name
- 🖼️ Logo URL - Your company logo (recommended: 200x60px)
- 🎨 Primary Color - Brand color for buttons and accents
- 🌈 Background Color - Page background color
- 📝 Custom CSS - Advanced styling customization
// Example branding configuration
const brandingConfig = {
  companyName: 'Your Company',
  logoUrl: 'https://yourapp.com/logo.png',
  primaryColor: '#007bff',
  backgroundColor: '#ffffff',
  customCss: `
    .auth-container {
      border-radius: 12px;
      box-shadow: 0 4px 20px rgba(0,0,0,0.1);
    }
    .auth-title {
      font-family: 'Your Custom Font';
    }
  `
};
- Format: PNG, JPG, or SVG
- Size: Recommended 200x60px (will be auto-scaled)
- URL: Must be publicly accessible HTTPS URL
- File Size: Keep under 1MB for best performance
4. OAuth Providers Configuration
Configure third-party OAuth providers:
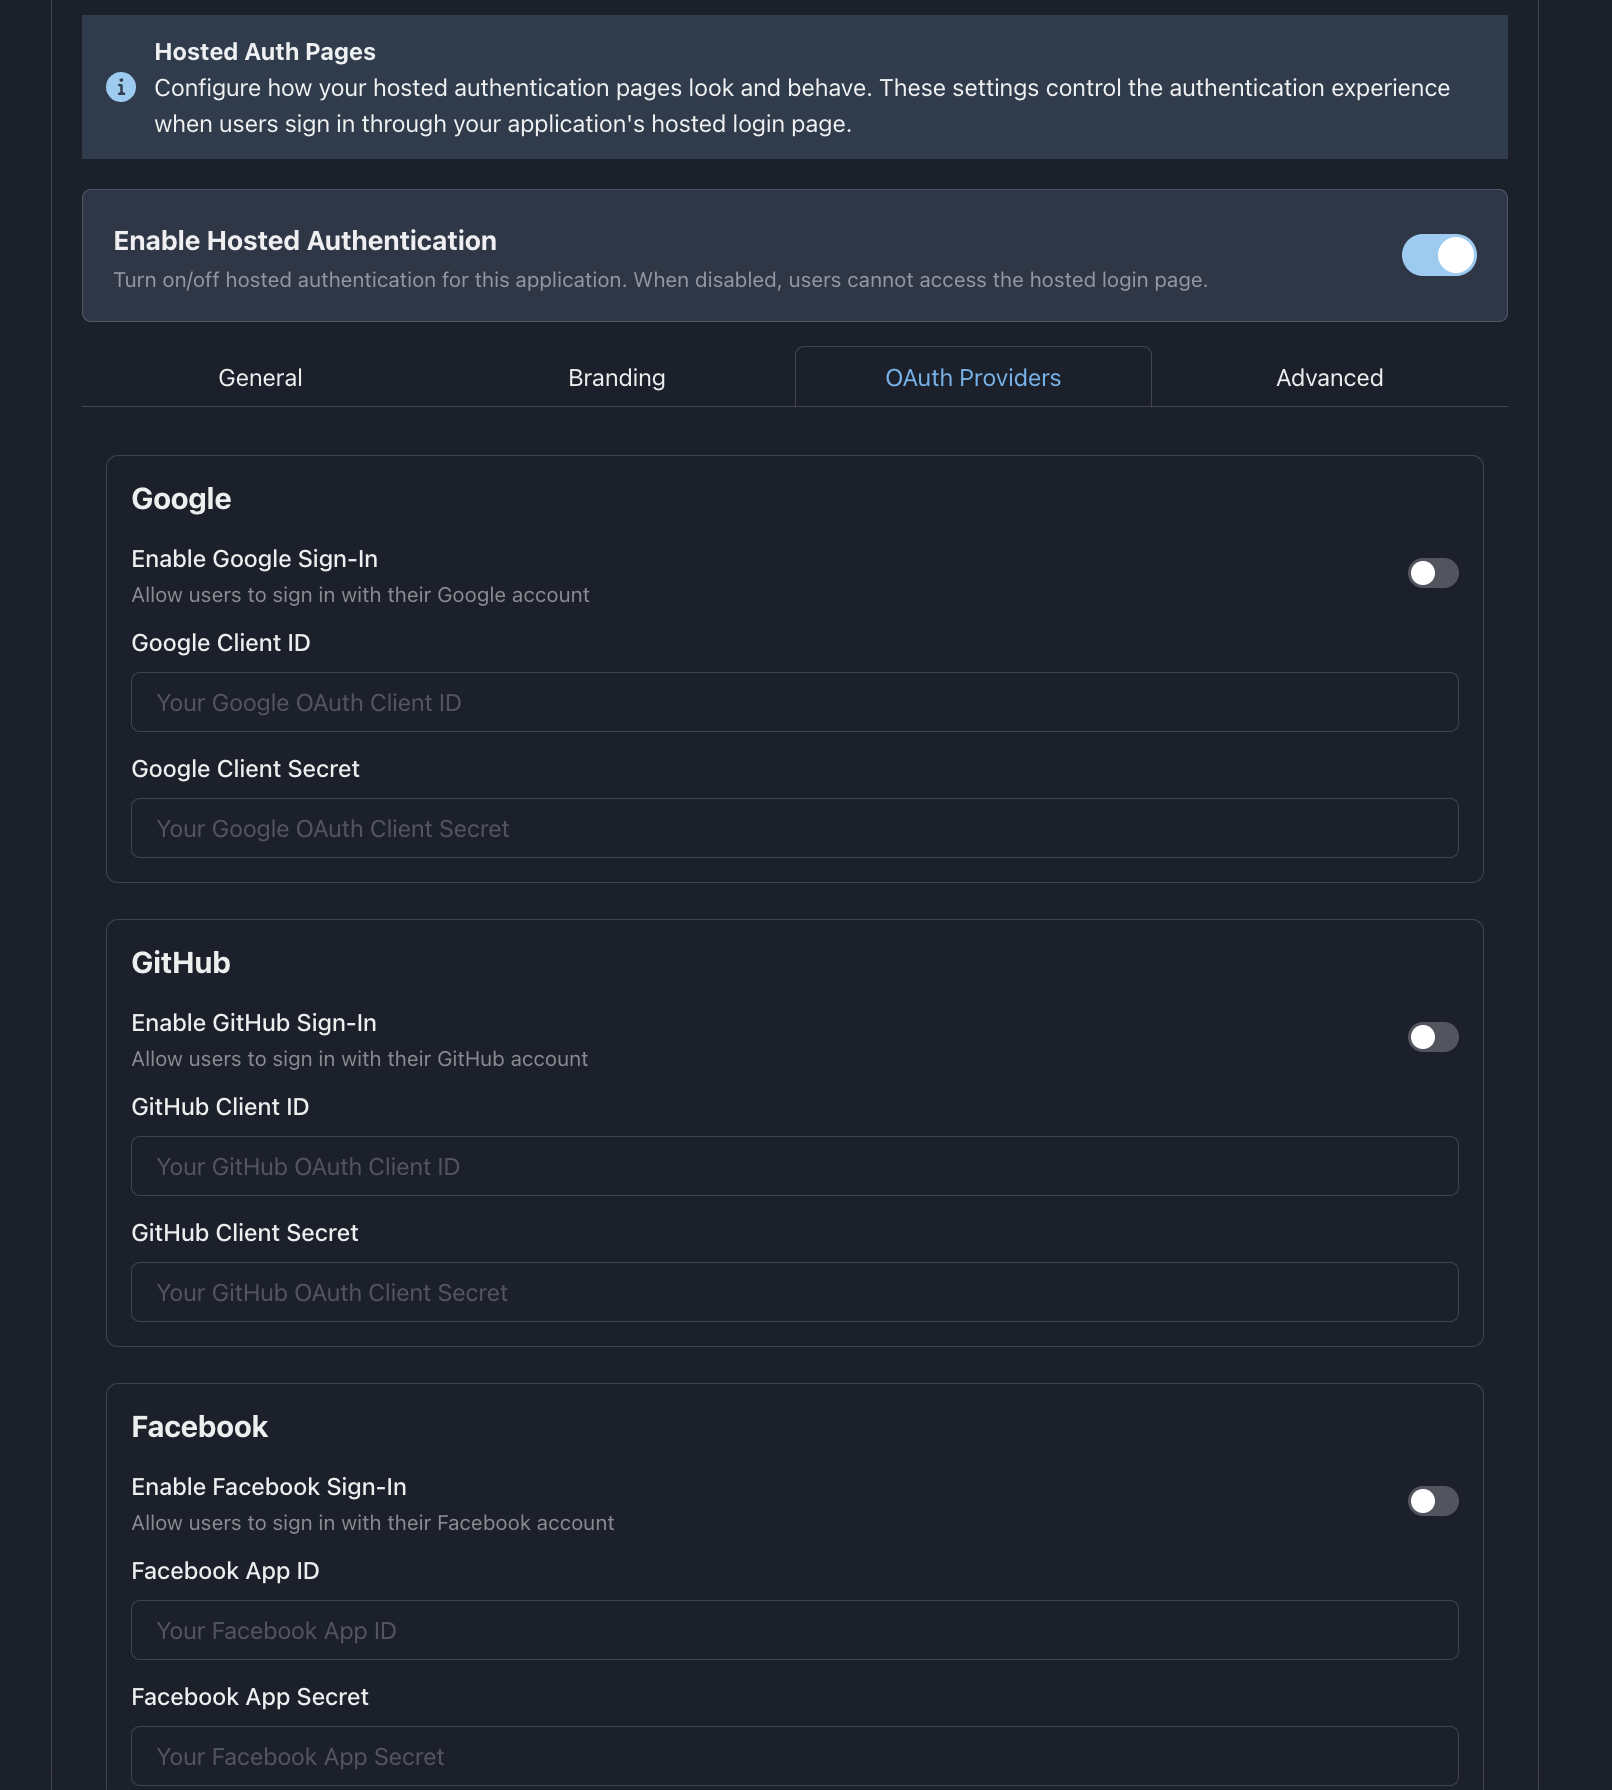
Supported Providers
- 🔍 Google - Google OAuth 2.0
- 🐙 GitHub - GitHub OAuth
- 🍎 Apple - Sign in with Apple
- Ⓜ️ Microsoft - Microsoft OAuth (Azure AD)
- 📘 Facebook - Facebook Login
Provider Setup
- Enable Provider - Toggle on the providers you want to support
- Client ID - Enter your OAuth app's client ID
- Client Secret - Enter your OAuth app's client secret (for server-side)
- Scopes - Configure requested permissions
// Example OAuth configuration
const oauthConfig = {
  google: {
    enabled: true,
    clientId: 'your-google-client-id',
    scopes: ['email', 'profile']
  },
  github: {
    enabled: true,
    clientId: 'your-github-client-id',
    scopes: ['user:email']
  },
  microsoft: {
    enabled: true,
    clientId: 'your-microsoft-client-id',
    scopes: ['openid', 'email', 'profile']
  }
};
Each provider requires you to create an OAuth application in their developer console. See our OAuth Provider Setup Guide for detailed instructions.
5. Advanced Configuration
Configure security and redirect settings:
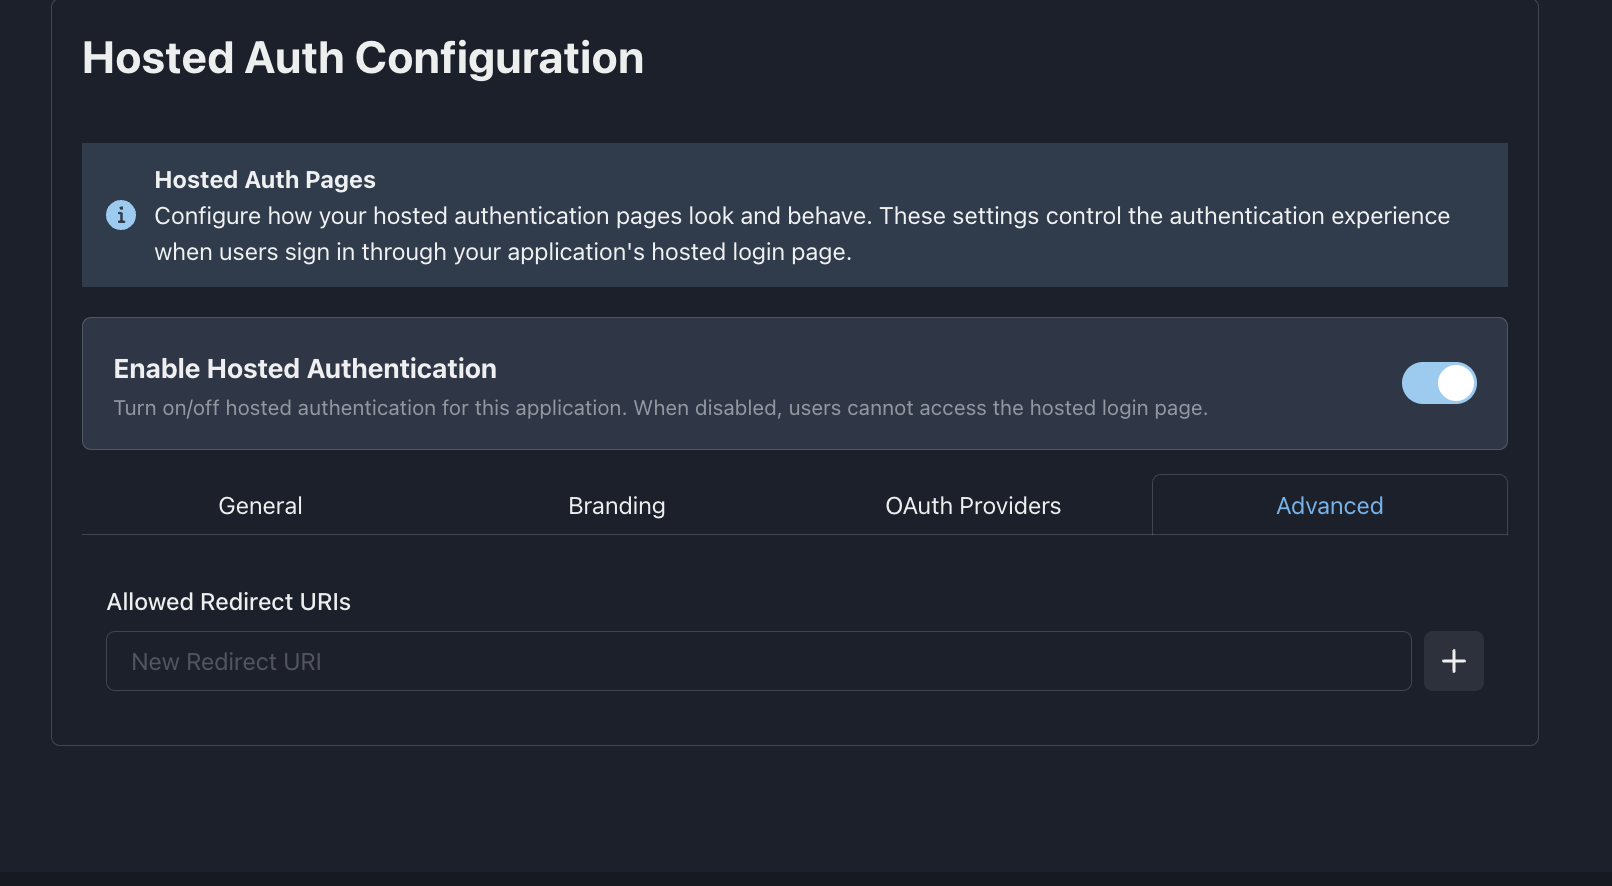
Security Settings
- 🔒 Allowed Redirect URIs - Whitelist valid redirect destinations
- 🌐 Allowed Origins - CORS configuration for your domains
- ⏱️ Session Duration - How long authentication sessions last
- 🔄 Refresh Token - Enable/disable refresh token support
// Example advanced configuration
const advancedConfig = {
  allowedRedirectUris: [
    'https://yourapp.com/auth/callback',
    'https://yourapp.com/auth/success',
    'https://staging.yourapp.com/auth/callback'
  ],
  allowedOrigins: [
    'https://yourapp.com',
    'https://staging.yourapp.com'
  ],
  sessionDuration: 3600, // 1 hour in seconds
  refreshTokenEnabled: true
};
Redirect URI Security
- Use HTTPS: All redirect URIs must use HTTPS in production
- Exact Matching: URIs must match exactly (including query parameters)
- No Wildcards: Specific URIs only for security
Session Management
- Duration: Set appropriate session length for your use case
- Refresh Tokens: Enable for long-lived sessions
- Security: Shorter sessions are more secure
- All redirect URIs must be HTTPS in production
- Keep allowed origins list minimal for security
- Use appropriate session durations for your security requirements
6. Configuration Validation
After configuration, validate your setup:
Testing Checklist
- Hosted auth toggle is enabled
- Callback URL is set and reachable
- OAuth providers are configured with valid credentials
- Redirect URIs match your application URLs
- Branding displays correctly
- HTTPS is configured for production
Common Configuration Issues
- Authentication Disabled: Check that hosted auth toggle is ON
- Invalid Redirect: Ensure redirect URIs are exactly configured
- OAuth Errors: Verify client IDs and secrets are correct
- CORS Issues: Check allowed origins configuration
Once configuration is complete, proceed to the Implementation Guide to integrate hosted auth into your application.